How to Craft the Ultimate Cat Scratching Post (Your Furniture Will Thank You)
Keep your cat happy and your sofa safe with a DIY scratching post
Share Article
In this article:
Design a cat scratching postopens in new tab Tools and materialsopens in new tab Step-by-step guideopens in new tab Customisationopens in new tab How to care for your cat scratching postopens in new tab FAQsopens in new tab
Cats love to scratch. It’s a natural, instinctive behaviour for them, helping them look after their claws, get some exercise and stress relief, reduce the risk of behavioural issuesopens in new tab, and even mark their territory.
But you won’t want them to scratch the furniture or walls , and that’s where a cat scratching post will come in. If your cat has something to scratch that’s the perfect height and material for them to enjoy, you’ll be able to protect your own possessions.

Get (totally free) deals for food, treats, accessories, tech and way more pet parenting must-haves.
You can buy scratching posts, of course, but why not try making your own? As it turns out, it’s surprisingly easy. Once you’ve gathered a few materials and some simple tools, you’ll be well on your way.
How to design a cat scratching post
For a simple cat scratching post, you’ll want to consider how big you’d like the cat scratching post to be, both in terms of the length and width of the base but also the height of the post itself. The cat scratching post should be at least 60cm tall, to allow your cat to fully stretch out on it. Decide on the fabric you’d like to use, too, and then make sure you have all of the tools and materials you’ll need before you raise your cat parenting game by making a start.
Tools and materials you’ll need to make a cat scratching post
Everything you’ll need to make your own cat scratching post:
staple gun
hammer
circular saw
speed square
stanley knife
mitre saw or hand saw and mitre box
drill
just over 30m of 10mm sisal rope
fabric or rug slightly larger than 50cm x 50cm
Untreated 100mm x 100mm plywood beam
20mm thick plywood base
wood glue
100mm x 100mm decorative end cap
decorative edge slightly longer than 20mm
4mm x 60mm wood screws
18 x 15mm wire nails
Step-by-step guide to making a cat scratching post
Step 1: plan your scratching post
Before you begin making the cat scratching post, it’s important to plan it. Make sure you know what size you’re aiming for so you can cut your wood accordingly ensuring that the base is the right size to fit the post onto, and gather your tools and materials.
If you don’t have a circular saw, you don’t need to buy one solely for this – retailers such as B&Qopens in new tab, Selcoopens in new tab and TradePointopens in new tab offer timber-cutting services, as do many independent providers.
Step 2: cut and prepare the wood
Cut your wood so that it’s the right size. You’ll need a non-treated plywood beam to become the post itself and a piece of plywood to become the base. On the base, draw lines from corner to corner to identify the centre, place the post there, and trace around it.
Drill four holes through the board in the area where you traced, and make sure to place some scrap wood behind the board you’re drilling through to avoid damage to any floors.
Step 3: attach the base and post together
Put some wood glue on the bottom of your plywood post and place it on top of the base, wiping away excess glue away as needed. Let the glue dry for several hours, checking occasionally to ensure that the post doesn’t move a little.
Flip over the scratching post and screw the base and post together. Long screws will be best for this – 100mm screws would be ideal.
At this point, you can also apply the wood that’s going to make your decorative edge. Cut these pieces of wood at a 45-degree angle using a mitre saw or a hand saw and mitre box.
Step 4: add the fabric to the base
Mark your fabric of choice, drawing out the shape of the post around the centre, and then use scissors and a Stanley knife to cut inside of the square – make sure you leave about 120mm uncut.
Use your scissors again, this time to cut the corners of the square up to the edge of where you’ve drawn the square.
Jiggle the post slightly to see if it’s dried – if it remains still, you can gently slide the rug over the post. If needed, make your cuts slightly larger and give it another go. Then, pull the rug up from the base and use a strong glue to make it stick. Once you’ve glued the whole thing, add weight to it and leave the glue to dry.
Once the glue has dried, use a staple gun to secure the fabric to the post. Try to get it as close to where the two pieces of wood meet as you can. Then, carefully trim any excess fabric from the base.
Step 5: Wrap the post in rope
Use a small wire nail to secure the end of your rope onto the post, over the rug where it’s stapled on. Tightly wrap the rope around the post, going up it. After every two or three wraps, push the rope down lightly with your hands to ensure you don’t leave any gaps.
Then, get your hammer and tap a small wire nail into the centre of the rope, keeping it tight. As you work your way up, add another nail every two or three wraps. After every two nails, turn the base so the rope will be attached on all four sides.
When you reach the top of the post, glue the end of the rope in and leave it to dry so it won’t fray too soon. Trim the end and secure it with a nail. Get your decorative end cap, find the centre of the top of your post and drill a hole, fixing the cap in with a long wood screw.
Customisation and additional cat scratching post features
Add toys and accessories
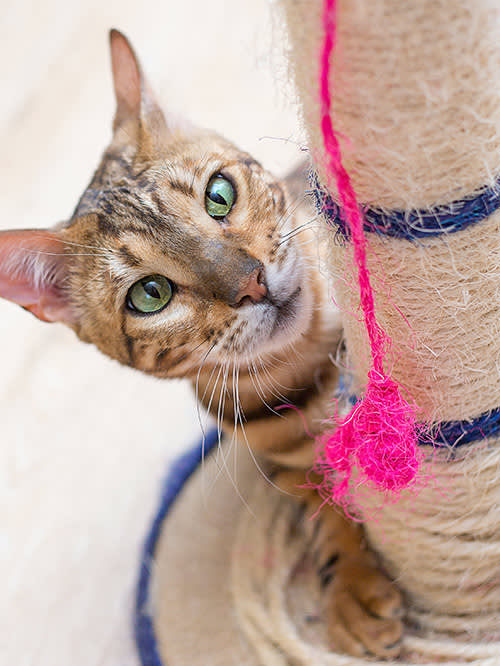
Often, cats love playing with toys that hang from scratching posts, so why not incorporate one or two in? If the top cap is larger and stretches out over to cover part of the base, you could affix toys like hanging balls, for example. They’re great for extra enrichment, and you could even add some catnip, too.
Incorporate multiple levels
If you’re after more of a challenge, you could add multiple levels to your scratching post. If you have more plywood, you could add additional platforms, securing them in between the beams for a particularly impressive piece of cat furniture.
Personalise with colours and patterns
Why not make your cat scratching post fit in with the rest of your decor or include all of your favourite colours? Consider the colours you’d like for the fabric and rope.
How to care for your cat scratching post
If you’ve put your cat scratching post together properly, it should last you a long time. Just keep a watch out, making sure that everything looks right. If the rope begins to fall away or it breaks, simply change it for fresh rope.
Final thoughts: how to make a cat scratching post
Making a cat scratching post yourself is a great option if you feel like a challenge or would rather not buy one that’s already made. Once you’ve got all the materials and tools you need, getting started is simple.
Frequently asked questions: DIY Cat Scratching Post
What can I use for a cat scratching post?
To make a cat scratching post, plywood is ideal – both for the base and for the post itself. Then you can add fabric and rope for your cat to scratch on.
What is the best rope for a cat scratching post?
Sisal rope is best. Cats love to scratch it and it tends to last longer than other types of rope.
Do scratching posts really work for cats?
Most cats love using scratching posts, and they make a welcome alternative to them using the furniture instead – you can help cat-proof your house.
What kind of glue to use on a cat scratching post?
Wood glue is the best option, but if you don’t have any, a multi-use glue can also work.

Adam England
Adam England is a lifestyle and culture journalist who has written for publications including PetsRadar, Verywell Mind, People and Healthline. When he’s not writing, he might be visiting his parents’ Golden Retriever, looking up cats for adoption, or getting into arguments over music.
Related articles
![Cat sitting on a kitchen chair, looking at the camera]()
How to Kitten-Proof Your House
A cat behaviourist’s 10 steps for keeping your cat out of trouble
![cat playing with pikachu toy]()
Happy Cat, Happy Life: 5 Enrichment Tips to Keep Your Kitty Content
What is enrichment and why is it so important to keep your kitty happy?
![black cat doing zoomies on a bed]()
Your Cat’s Erratic Zoomies – Explained
Fast, furious and officially normal – according to a cat behaviourist
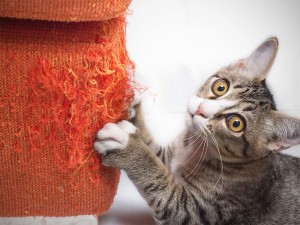
![Kitten scratching fabric sofa]()
How to Stop Your Cat From Absolutely Ripping Apart Your Couch
Placing a cat tree or post in a room only, uh, scratches the surface of solving this problem
